In this blog post, I’ll walk through the steps to Dockerize a Node.js application and deploy it to Amazon ECS using Amazon ECR. You can find the complete sample Node.js application and deployment scripts in this GitHub repository:
GitHub Repository: node-docker-aws-deployment
Prerequisites
- AWS Account: Make sure you have an AWS account.
- AWS CLI: Installed and configured with your AWS credentials.
- Docker: Installed and running on your local machine.
- Node.js : Installed on your local machine.
Step 1: Dockerize the Node.js Application
1. Clone the repository:
git clone https://github.com/thomas-tony/node-docker-aws-deployment.git
cd node-docker-aws-deployment
2. Build the Docker image:
Build the Docker image using the Dockerfile. Run the following command in the directory containing the Dockerfile:
docker build -t my-node-app .This command builds the Docker image and tags it as my-node-app.
3 .Run the Docker container locally:
docker run -d -p 80:8000 --name my-node-app-container my-node-appStep 2: Push the Docker Image to AWS ECR
1. Create a repository in AWS ECR:
aws ecr create-repository --repository-name my-node-app --region us-east-12. Authenticate Docker to the ECR registry:
aws ecr get-login-password --region us-east-1 | docker login --username AWS --password-stdin <aws_account_id>.dkr.ecr.us-east-1.amazonaws.com3. Tag the Docker image:
docker tag my-node-app:latest <aws_account_id>.dkr.ecr.us-east-1.amazonaws.com/my-node-app:latest4. Push the Docker image to ECR:
docker push <aws_account_id>.dkr.ecr.us-east-1.amazonaws.com/my-node-app:latestStep 4: Deploy the Docker Image to AWS ECS with a Load Balancer
1. Create an ECS Cluster:
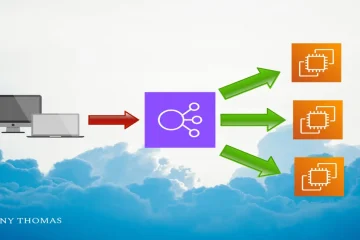
aws ecs create-cluster --cluster-name my-cluster2. Create an Application Load Balancer:
- Create a target group:
aws elbv2 create-target-group --name my-target-group --protocol HTTP --port 8080 --vpc-id <vpc-id> --target-type ip- Create the load balancer:
aws elbv2 create-load-balancer --name my-load-balancer --subnets <subnet-1-id> <subnet-2-id> --security-groups <security-group-id>- Create a listener:
aws elbv2 create-listener --load-balancer-arn <load-balancer-arn> --protocol HTTP --port 80 --default-actions Type=forward,TargetGroupArn=<target-group-arn>3. Create a Task Definition:
Save the following JSON to a file named task-definition.json:
{
  "family": "my-node-app-task",
  "networkMode": "awsvpc",
  "containerDefinitions": [
    {
      "name": "my-node-app",
      "image": "<aws_account_id>.dkr.ecr.us-east-1.amazonaws.com/my-node-app:latest",
      "essential": true,
      "memory": 512,
      "cpu": 256,
      "portMappings": [
        {
          "containerPort": 8000,
          "hostPort": 80,
          "protocol": "tcp"
        }
      ]
    }
  ],
  "requiresCompatibilities": ["FARGATE"],
  "cpu": "256",
  "memory": "512"
}
Register the task definition:
aws ecs register-task-definition --cli-input-json file://task-definition.json4. Create a Service with a Load Balancer:
aws ecs create-service --cluster my-cluster --service-name my-node-app-service --task-definition my-node-app-task --desired-count 1 --launch-type FARGATE --network-configuration "awsvpcConfiguration={subnets=[subnet-0123456789abcdef0],securityGroups=[sg-0123456789abcdef0],assignPublicIp=ENABLED}" --load-balancers "targetGroupArn=<target-group-arn>,containerName=my-node-app,containerPort=8000"Conclusion
You’ve successfully created a Docker image for your Node.js application, pushed it to AWS ECR, and deployed it using AWS ECS with a load balancer for public accessibility. This setup allows for scalable, managed container deployments, leveraging AWS’s robust infrastructure. Keep in mind this guide covers a basic deployment. Depending on your requirements, you might need to add additional configurations such as auto-scaling policies and more.