
In this blog post, I’ll walk you through creating a serverless application that automatically syncs metadata of files uploaded to an S3 bucket into a DynamoDB table using AWS Lambda. This setup is ideal for applications that require real-time metadata tracking and storage in a scalable, cost-effective manner.
Table Of Content
- Introduction
- Prerequisites
- Step 1: Set Up AWS Environment
- Create an S3 Bucket
- Create a DynamoDB Table
- Create an IAM Role for Lambda
- Step 2: Create the Lambda Function
- Create the Lambda Function
- Add the Code to Lambda
- Step 3: Configure S3 Trigger
- Add an S3 Trigger
- Step 4: Test the Setup
- Upload a File to S3
- Check DynamoDB
- Conclusion
Introduction
Amazon S3 is a popular cloud storage service known for its scalability and data availability. Amazon DynamoDB is a fast, flexible NoSQL database service. AWS Lambda allows you to run code without provisioning or managing servers. By combining these services, you can create a seamless and efficient way to track file uploads in real time.
Prerequisites
Before we start, make sure you have:
- An AWS account
- Basic knowledge of AWS services (S3, DynamoDB, Lambda)
- AWS CLI or AWS Management Console access
Step 1: Set Up AWS Environment
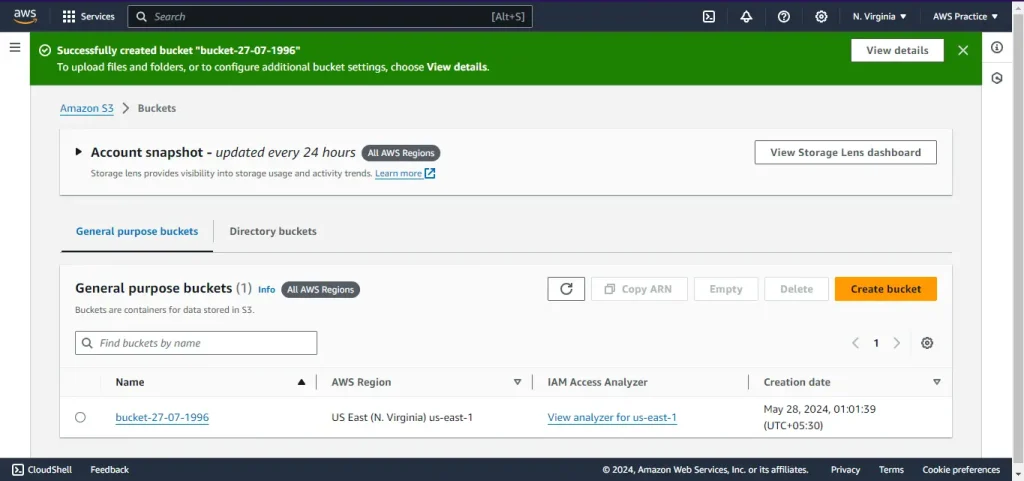
Create an S3 Bucket
- Open the S3 console.
- Click on Create bucket.
- Enter a unique bucket name (ex. bucket-27-07-1996)
- Choose the AWS region and other settings as per your requirement.
- Click Create bucket.
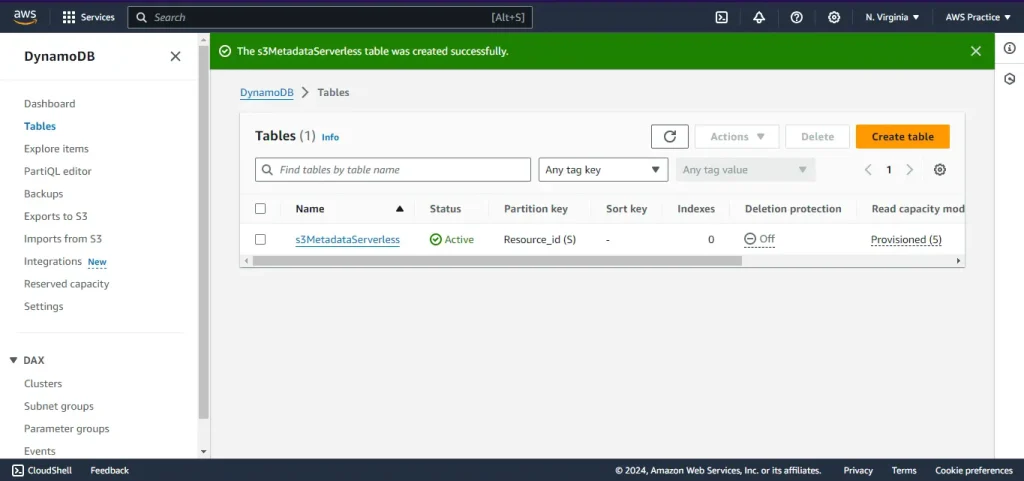
Create a DynamoDB Table
- Open the DynamoDB console.
- Click on Create table.
- Enter the table name as s3MetadataServerless.
- Set the Partition key/primary key as Resource_id (String).
- Configure additional settings as needed and click Create table.
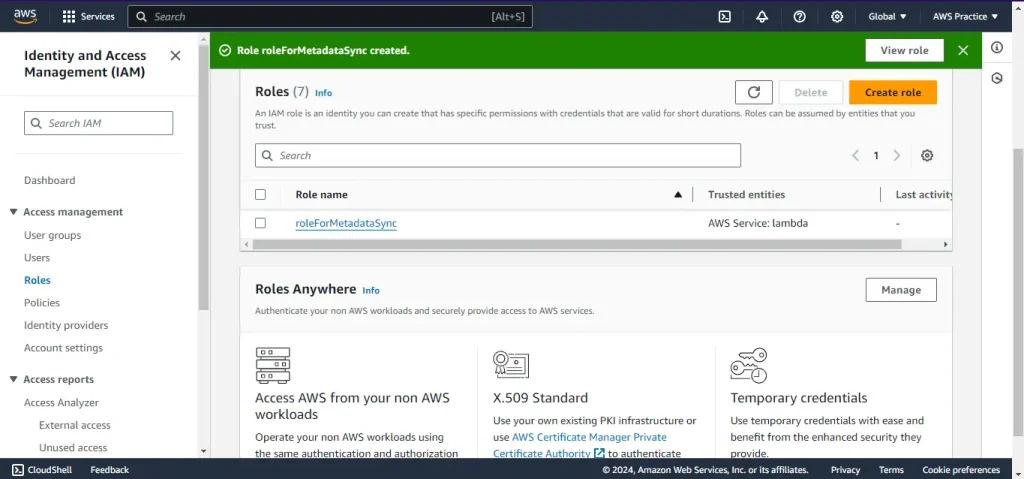
Create an IAM Role for Lambda
- Open the IAM console.
- Click on Roles and then Create role.
- Select AWS service and choose Lambda.
- Attach the following policies:
- AmazonS3ReadOnlyAccess
- AmazonDynamoDBFullAccess
- AWSLambdaBasicExecutionRole
- Give a name to the role (ex. roleForMetadataSync) and a description.
- Review the selections and click Create role.
Step 2: Create the Lambda Function
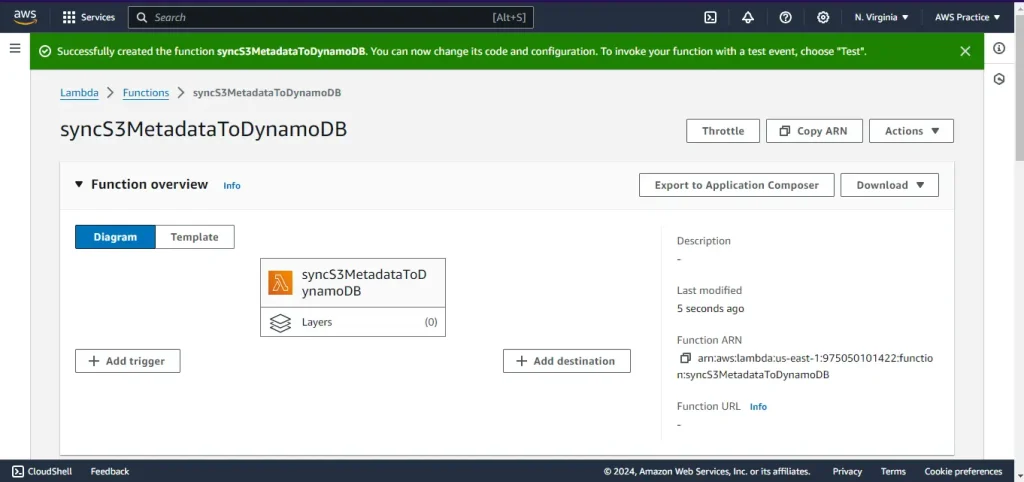
Create the Lambda Function
- Open the Lambda console.
- Click on Create function.
- Enter the function name as syncS3MetadataToDynamoDB.
- Choose Python 3.x as the runtime.
- Select the IAM role created earlier in Change default execution role option.
- Click Create function.
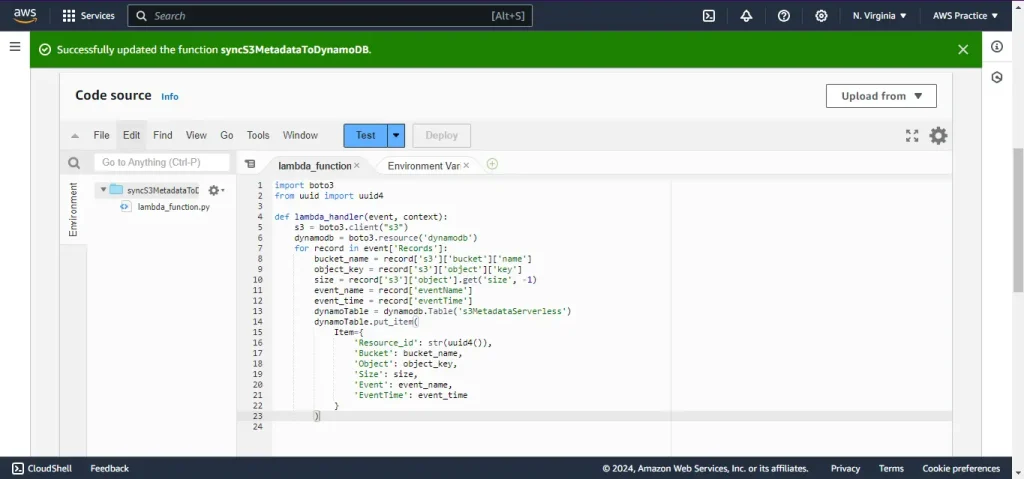
Add the Code to Lambda
Replace the default code with the following Python code:
import boto3
from uuid import uuid4

def lambda_handler(event, context):
    s3 = boto3.client("s3")
    dynamodb = boto3.resource('dynamodb')
    for record in event['Records']:
        bucket_name = record['s3']['bucket']['name']
        object_key = record['s3']['object']['key']
        size = record['s3']['object'].get('size', -1)
        event_name = record['eventName']
        event_time = record['eventTime']
        dynamoTable = dynamodb.Table('s3MetadataServerless')
        dynamoTable.put_item(
            Item={
                'Resource_id': str(uuid4()),
                'Bucket': bucket_name,
                'Object': object_key,
                'Size': size,
                'Event': event_name,
                'EventTime': event_time
            }
        )
After replacing the code press the Deploy button to update the lambda function.
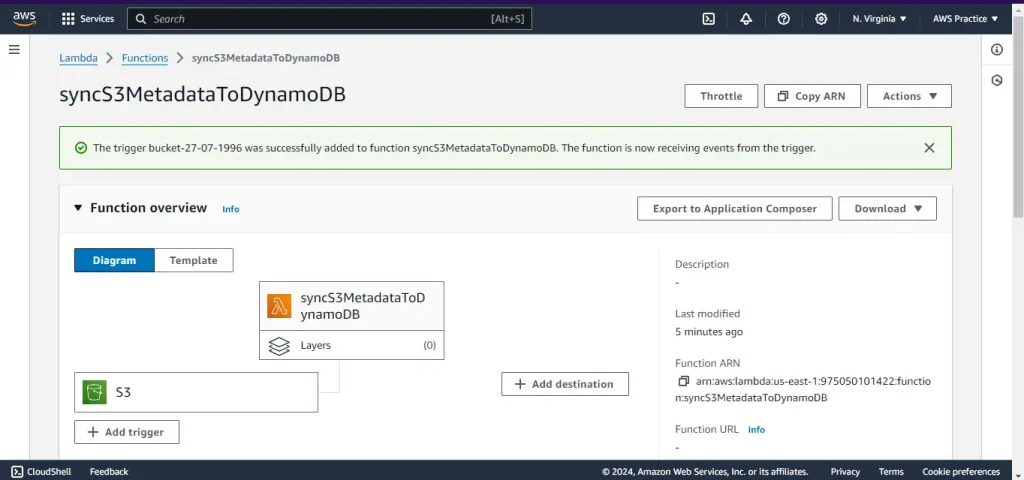
Step 3: Configure S3 Trigger
Add an S3 Trigger
- Go to the Lambda function configuration and click on Add trigger.
- Select S3 as the trigger source.
- Choose the S3 bucket created earlier (bucket-27-07-1996).
- Set the event type to All object create events (or any specific events such as s3:ObjectCreated:* ).
- Click Add.
Step 4: Test the Setup
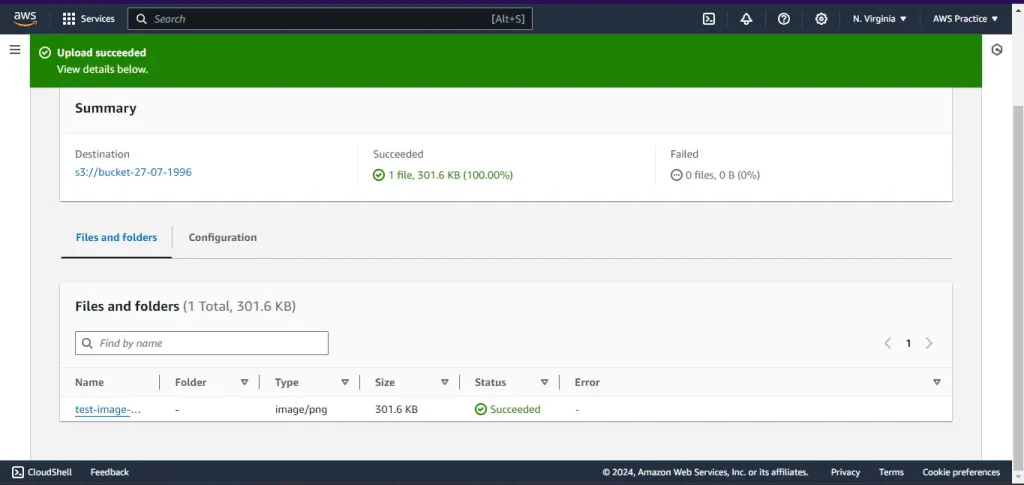
Upload a File to S3
- Open the S3 console and navigate to your bucket.
- Upload a test file to the bucket.
Check DynamoDB
- Open the DynamoDB console and navigate to your table (s3Metadataserverless).
- Click on the Explore table items button.
- If you see no items returned, then use Scan or query items option and select Scan and press Run.
- Now you see the data in the items returned section.
- Verify that a new item has been added with the correct metadata
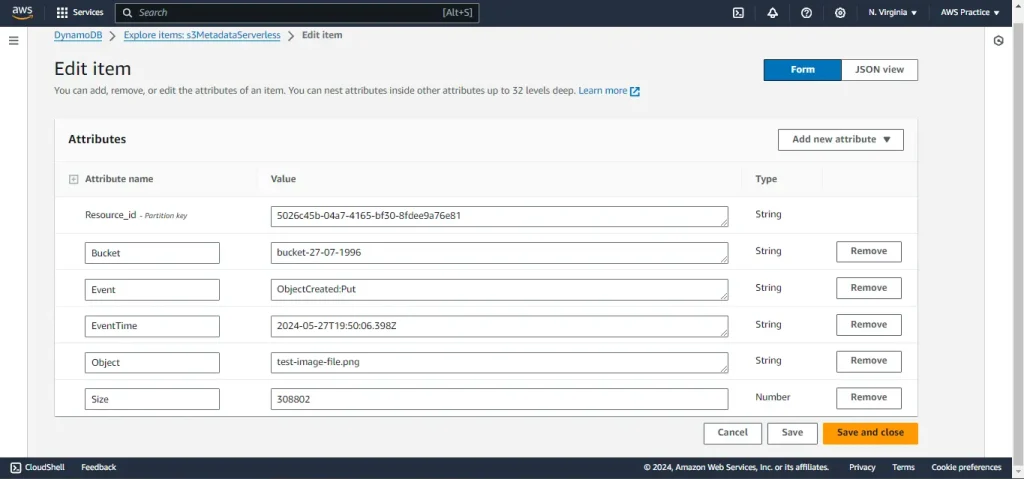
Fig 8: Successful sync of Metadata of test image file to the DynamoDB table.
Conclusion
By following these steps, you have successfully created a serverless application that syncs file metadata from S3 to DynamoDB using AWS Lambda. This setup not only simplifies metadata management but also uses the power of AWS services to provide a scalable and efficient solution.


